
I've had the idea for this piece ever since I found an interesting looking fuel filter at a junk store. (It's funny where ideas come from sometimes.) The filter had a clear glass container attached to it and I thought it would, along with other items, make for a curious assemblage. I liked the idea of using clear elements in an assemblage, and even added clear tubes to the mix. The defender concept came pretty easy. It measures 8" x 22" x 14".
I've posted a movie below....
The final shot. The found wooden box was the perfect size and appearance for the base.


Here you can see part of the fuel filter that started this piece - the green part. I ended up replacing the glass container with what you see here, because the glass was way too heavy.

All the elements, even the "hoses" were found pieces too.

The "gun" or sprayer was fun to assemble. Some parts have been sitting around the studio for years, and some, like the small tin seen here, was found only days before I started assembling the gun.


The gun in-progress, before I antiqued all the shiny parts down. When I can, I like to solder things together instead of using glue.


I love the color of the box.

Here's where I started.....
Before carving the legs, I wanted to work out the movement. The right leg moves forward and back which makes the torso turn side to side.
Before carving the legs, I wanted to work out the movement. The right leg moves forward and back which makes the torso turn side to side.

His two hands, carved from basswood. I always saturate the wood with CA glue after carving to make them stronger. That explains the color difference.

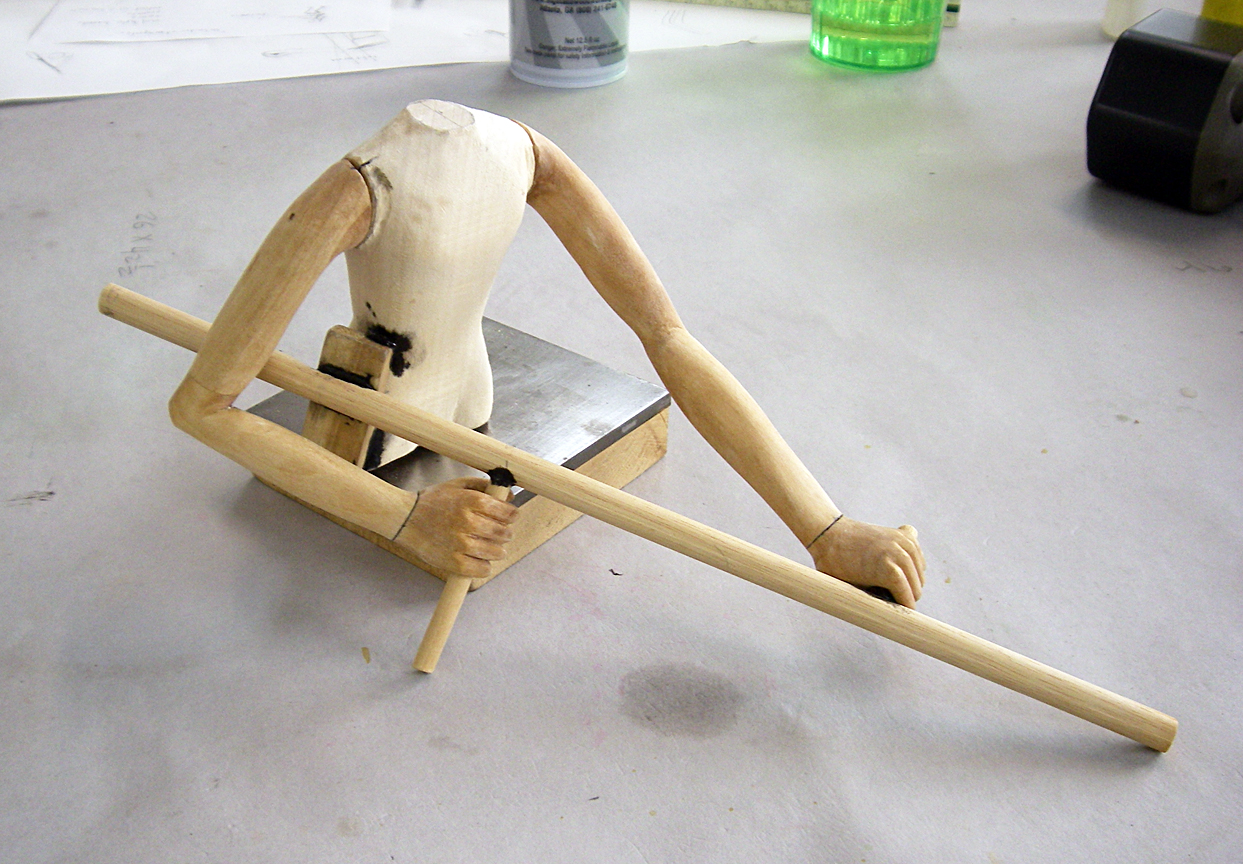
Here is his torso and his gun stand-in, used to figure out the position of the
hands and arms. I glued the "gun" to his hip so it would not change
position as I worked.

His body and head all painted. Here you can see one of the bearings and how the legs fit into the torso. The torso pivots on 2 bearings.

Working on his outfit - which was inspired by various emergency worker uniforms.

Assembling his body - legs first. Since only one leg is really attached to his body, I had to secure his feet to the base and work up from there.

I
put one arm on at a time. Next I placed the gun in his hands and
attached the other arm. They had to be strong because the have to hold
up the weight of the gun.

Putting the final touches on his uniform....

The "backpack" in progress.

The cam and follower, connected to the lever, which is connected to his right leg.

Here's the movie......... watch full screen.
Thanks for looking.
tom
No comments:
Post a Comment