Wednesday, January 22, 2014

"Chancey" - 2013

I had done a couple of spinning wheels before but never with a motor. I couldn't be happier with the way this piece turned out. (In my line of work, I always try to create that perfect piece I have in my head. It doesn't always hit the mark, but in this case it did.)

Click on images for larger views.

Push the button on the right and Chancey spins his wheel 3 times. (As you can see, your chances don't look good.) The base is an old handmade wooden toolbox I found at a flea market. I didn't do a thing to it except remove the handle.
The piece measures 19" x 19" x 7".

His shoulder has a special pivot on it, which enables him to lift his arm past the wheel on the way up, and contact the wheel on the downstroke.

He always has his eye out for the next sucker.......

I love the way his face turned out. Incidentally, I'm beginning to explore these seedier kind of characters in my work.
 

A shady character for sure. 
I'm thrilled to be able to create characters like this. When I started out sculpting heads they were much more primitive. As I have been teaching myself, each one gets better and better.


In-progress shots ---

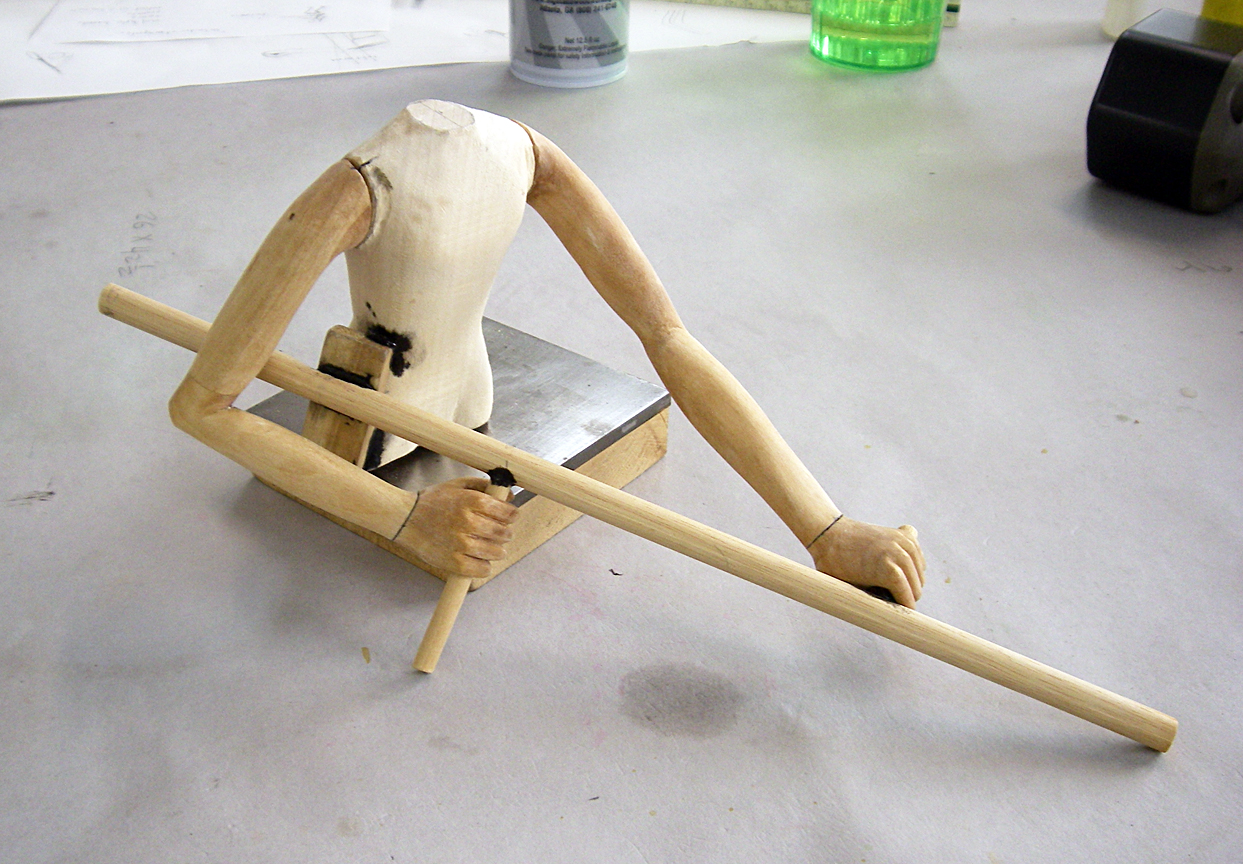
The arm needed to pivot towards his body so his hand can clear the wheel on the upstroke. On the downstroke, he reaches out to contact the wheel. This mechanism had to be figured out before I carved anything. And as always, I tried to make everything as strong as possible; in this case his hand was carved from poplar, which is much stronger than basswood.

His body and clothes, ready to be assembled.


His arm's pivot point.


Here I'm figuring out the critical position of the figure relative to the wheel, and visa versa. The piece is mounted on an old handmade tool box I found a few years back.

Another shot.

The mechanism, with two switches - one turns on the motor and the other automatically shuts it off after 3 strokes of the arm. The mechanism turned out to be simpler than what I initially thought it needed to be - love when that happens - so rare when building mechanisms from scratch. I added a lead weight to help with his arm pulling down on the wheel.


I'm working on putting together a short movie for this piece, but for now.....

Thanks for looking!

tom


Friday, November 1, 2013

"Out of the Darkness" - 2013

Inspiration for this piece came when I received a collection of beautiful ornaments from my friend Eric Cortina to be used in our "Boxcar Fair" Fortune Teller's set. I loved the look of the ornaments and I knew I just had to make a kinetic piece using them. Thanks for the inspiration Eric! 

As she pulls the rope, the 3 lanterns raise and lower. I hid a motion detector in the bottom part of the piece, one of the reasons for the 3 cutouts.
 

A side shot to show the depth. This piece is meant to hang on the wall, but it can be placed on a table or a shelf. It measures 25" x 27" x 7", and is sold.


The overall look is a bit of a return to my older style - a fully painted tableaux. Originally, the pulley and rope were to be secured to the "box", but I like them attached to the "tree" in the corner better.

Her dress is a piece of fabric from a former clothing item of mine - I won't say which one.


I wanted some sort of textured background, and since I have plenty of scrap wood around, I thought a pieced-together fence might be interesting. I love how this came out, (I'd love to build one full-size some day).


The mechanism is hidden in her chest. I figured out all the mechanics before I spent any time carving the body.

I'm using 2 bearings which will let her arm rotated almost friction free. A line that runs through her leg will pull the small lever down, and make her arm rotate.


I made two "access doors" that protect the mechanism from interference.


My worktable, post-carving.


Her polymer clay head.


Her body ready to be painted. You can see the two carved "access doors" that will be pressure fitted into the torso.

Her body, ready for final assembly.

Here I'm testing out the placement of the figure and the lanterns - this determines where the mechanism below needs to be. It's always a bit of a balancing act - what looks best verses what works and how much room is required.


The back access panel open - just before her shirt is sewn up.

Making the cabinet. I couldn't find an appropriate container in my stash, so I decided to make it from scratch, (much more time consuming).

I laid parchment paper in the box in order to build the fence. The fence is made from many bits of scrap wood. I needed to remove the fence in order to properly paint and age it. Here you can see that I already painted the background.

After the glue dried, I pulled the fence out. Here it is ready for multiple applications of stain and paint.

Before I painted, I masked the "trees" off - they already had great color. It was fun creating this and I sometimes miss this kind of painting.

Continuing the painting of the box.
The bright blue is just an undercoat - a bit of this color is seen after I aged and sanded the cabinet.


Finally putting it all together - slowly. Before the fence was glued into place, I had to run the wire for the lights up and around the tree on the left - and then fish it down below so it can be connected to a transformer.

Here you can see the motion detector, and cam and lever.  I made the motion detector and transformer easily replaceable, (if ever need be).

Here's that movie... it's best to watch full screen.

Thanks for looking!

tom


Thursday, September 5, 2013

"Defender of the Aquifer" - 2013

I've had the idea for this piece ever since I found an interesting looking fuel filter at a junk store. (It's funny where ideas come from sometimes.) The filter had a clear glass container attached to it and I thought it would, along with other items, make for a curious assemblage. I liked the idea of using clear elements in an assemblage, and even added clear tubes to the mix. The defender concept came pretty easy. It measures 8" x 22" x 14".

I've posted a movie below....

The final shot. The found wooden box was the perfect size and appearance for the base.  


Here you can see part of the fuel filter that started this piece - the green part. I ended up replacing the glass container with what you see here, because the glass was way too heavy.

All the elements, even the "hoses" were found pieces too.

The "gun" or sprayer was fun to assemble. Some parts have been sitting around the studio for years, and some, like the small tin seen here, was found only days before I started assembling the gun.


The gun in-progress, before I antiqued all the shiny parts down. When I can, I like to solder things together instead of using glue.


I love the color of the box. 

Here's where I started.....
Before carving the legs, I wanted to work out the movement. The right leg moves forward and back which makes the torso turn side to side.

His two hands, carved from basswood. I always saturate the wood with CA glue after carving to make them stronger. That explains the color difference.

Here is his torso and his gun stand-in, used to figure out the position of the hands and arms. I glued the "gun" to his hip so it would not change position as I worked.

The body - all carved and ready for paint etc. Here you can see the pivot point for his right leg, which is in his right shoe.

His body and head all painted. Here you can see one of the bearings and how the legs fit into the torso. The torso pivots on 2 bearings.


Working on his outfit - which was inspired by various emergency worker uniforms.

Assembling his body - legs first. Since only one leg is really attached to his body, I had to secure his feet to the base and work up from there.

I put one arm on at a time. Next I placed the gun in his hands and attached the other arm. They had to be strong because the have to hold up the weight of the gun.

Putting the final touches on his uniform....

The "backpack" in progress.

The cam and follower, connected to the lever, which is connected to his right leg.

Here's the movie......... watch full screen.


Thanks for looking.

tom