Friday, November 1, 2013

"Out of the Darkness" - 2013

Inspiration for this piece came when I received a collection of beautiful ornaments from my friend Eric Cortina to be used in our "Boxcar Fair" Fortune Teller's set. I loved the look of the ornaments and I knew I just had to make a kinetic piece using them. Thanks for the inspiration Eric! 

As she pulls the rope, the 3 lanterns raise and lower. I hid a motion detector in the bottom part of the piece, one of the reasons for the 3 cutouts.
 

A side shot to show the depth. This piece is meant to hang on the wall, but it can be placed on a table or a shelf. It measures 25" x 27" x 7", and is sold.


The overall look is a bit of a return to my older style - a fully painted tableaux. Originally, the pulley and rope were to be secured to the "box", but I like them attached to the "tree" in the corner better.

Her dress is a piece of fabric from a former clothing item of mine - I won't say which one.


I wanted some sort of textured background, and since I have plenty of scrap wood around, I thought a pieced-together fence might be interesting. I love how this came out, (I'd love to build one full-size some day).


The mechanism is hidden in her chest. I figured out all the mechanics before I spent any time carving the body.

I'm using 2 bearings which will let her arm rotated almost friction free. A line that runs through her leg will pull the small lever down, and make her arm rotate.


I made two "access doors" that protect the mechanism from interference.


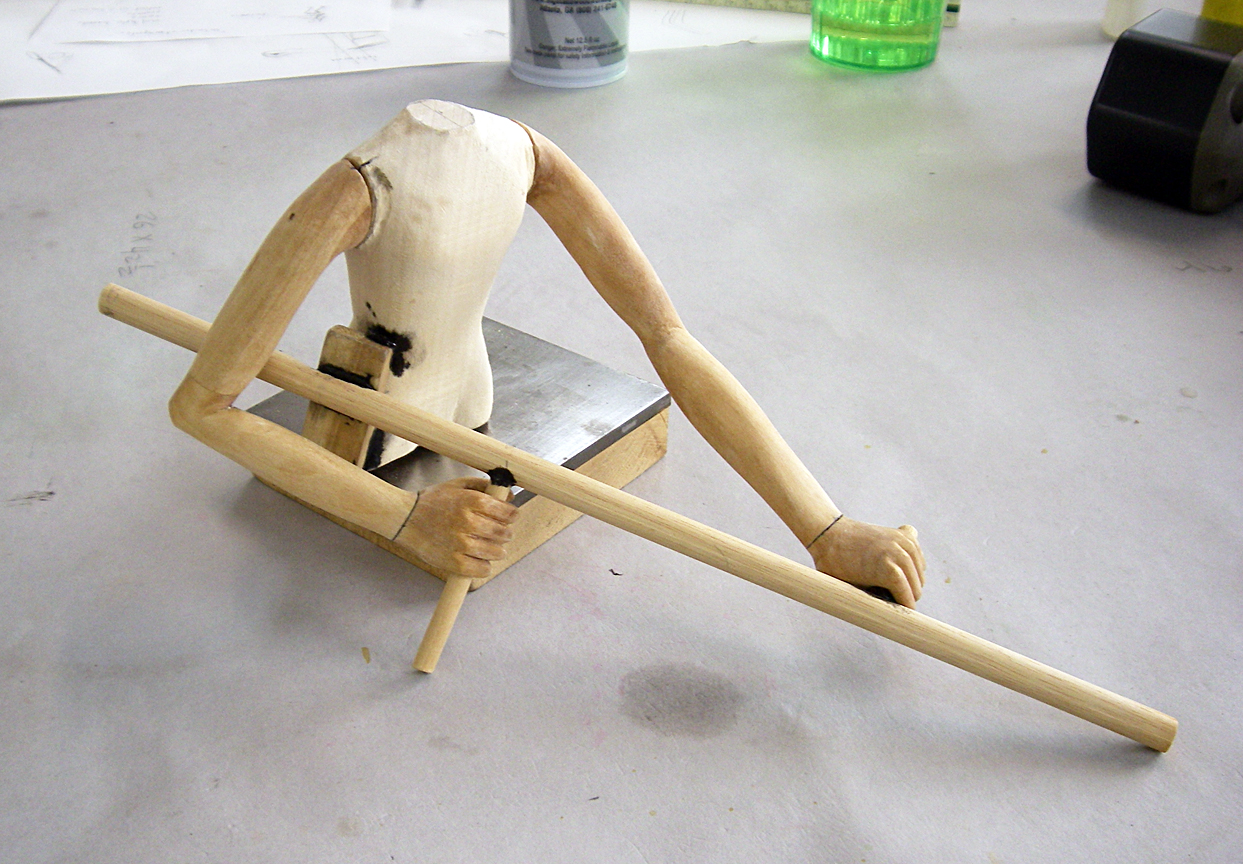
My worktable, post-carving.


Her polymer clay head.


Her body ready to be painted. You can see the two carved "access doors" that will be pressure fitted into the torso.

Her body, ready for final assembly.

Here I'm testing out the placement of the figure and the lanterns - this determines where the mechanism below needs to be. It's always a bit of a balancing act - what looks best verses what works and how much room is required.


The back access panel open - just before her shirt is sewn up.

Making the cabinet. I couldn't find an appropriate container in my stash, so I decided to make it from scratch, (much more time consuming).

I laid parchment paper in the box in order to build the fence. The fence is made from many bits of scrap wood. I needed to remove the fence in order to properly paint and age it. Here you can see that I already painted the background.

After the glue dried, I pulled the fence out. Here it is ready for multiple applications of stain and paint.

Before I painted, I masked the "trees" off - they already had great color. It was fun creating this and I sometimes miss this kind of painting.

Continuing the painting of the box.
The bright blue is just an undercoat - a bit of this color is seen after I aged and sanded the cabinet.


Finally putting it all together - slowly. Before the fence was glued into place, I had to run the wire for the lights up and around the tree on the left - and then fish it down below so it can be connected to a transformer.

Here you can see the motion detector, and cam and lever.  I made the motion detector and transformer easily replaceable, (if ever need be).

Here's that movie... it's best to watch full screen.

Thanks for looking!

tom


Thursday, September 5, 2013

"Defender of the Aquifer" - 2013

I've had the idea for this piece ever since I found an interesting looking fuel filter at a junk store. (It's funny where ideas come from sometimes.) The filter had a clear glass container attached to it and I thought it would, along with other items, make for a curious assemblage. I liked the idea of using clear elements in an assemblage, and even added clear tubes to the mix. The defender concept came pretty easy. It measures 8" x 22" x 14".

I've posted a movie below....

The final shot. The found wooden box was the perfect size and appearance for the base.  


Here you can see part of the fuel filter that started this piece - the green part. I ended up replacing the glass container with what you see here, because the glass was way too heavy.

All the elements, even the "hoses" were found pieces too.

The "gun" or sprayer was fun to assemble. Some parts have been sitting around the studio for years, and some, like the small tin seen here, was found only days before I started assembling the gun.


The gun in-progress, before I antiqued all the shiny parts down. When I can, I like to solder things together instead of using glue.


I love the color of the box. 

Here's where I started.....
Before carving the legs, I wanted to work out the movement. The right leg moves forward and back which makes the torso turn side to side.

His two hands, carved from basswood. I always saturate the wood with CA glue after carving to make them stronger. That explains the color difference.

Here is his torso and his gun stand-in, used to figure out the position of the hands and arms. I glued the "gun" to his hip so it would not change position as I worked.

The body - all carved and ready for paint etc. Here you can see the pivot point for his right leg, which is in his right shoe.

His body and head all painted. Here you can see one of the bearings and how the legs fit into the torso. The torso pivots on 2 bearings.


Working on his outfit - which was inspired by various emergency worker uniforms.

Assembling his body - legs first. Since only one leg is really attached to his body, I had to secure his feet to the base and work up from there.

I put one arm on at a time. Next I placed the gun in his hands and attached the other arm. They had to be strong because the have to hold up the weight of the gun.

Putting the final touches on his uniform....

The "backpack" in progress.

The cam and follower, connected to the lever, which is connected to his right leg.

Here's the movie......... watch full screen.


Thanks for looking.

tom

Thursday, July 18, 2013

Four New Shadowboxes - 2013

After making my initial shadowboxes back in 2010, I knew I would eventually make more. I made extra boxes and even decoupaged them back then. Only now am I getting around to using them.

With this round I wanted to make pieces with stronger story lines. Also I wanted to create a richer textural feel to the box element, I think I succeeded on both points.

All the shadowboxes are 16 1/2" x 16 1/2" x 4", and are signed and dated. They are all sold.

Here is how the figures start. You can see the posable form I use to place each figure in position. The torsos are cut and the arms and legs are roughed out - each has a half lap joint at the knee or elbow. 


A shot during carving. Since I rarely work on more than one piece at a time, these figures seemed more labor-intensive than others. I had to keep reminding myself, "you're working on 4 pieces". The rough drawings for each piece are seen underneath all the shavings.


The 8 hands. With these shadowbox figures, I've decided to keep the arms, legs, and hands simpler and more stylized than my typical figures.

Many arms - after I added all the hands. Each arm and leg had to be number to keep me from mixing them up.


"Lost & Found" SOLD

This piece could also be considered a bit of a self-portrait. I'm always on the look out for interesting found objects - and often have wonderful dreams where I'm finding huge stashes of incredible things. In one memorable dream, the items were submerged in a clear rushing stream. 

Dressed in all his finery, our hero is picking up many kinds of fabulous objects; blissfully filling his basket.


"Wordsmithing" SOLD

This piece is a homage to all who work with the written word. Though language is not my strong suit, I do have an affinity for certain words - some of which are included in the collection here.


"Local Loudmouth" SOLD

This piece is sort of self-explanatory. It wasn't until I was doing the final assembly, that I thought of adding the words coming from his bullhorn. 


"Mechanical Advantage" SOLD

This piece speaks of the courageous women who choose to work in fields typically dominated by men. Though her dress came out looking more like a Tibetan princess, I like that it contrasts with her task at hand. Oh, and this is the first time I've used real hair for one of my figures. It's from my wife's head and I've been saving it for about 5 years.


tom